Mars' Avatar Guide
Info and tips on how to use VR & V-Tubing avatars made by me
Project maintained by emperorofmars Hosted on GitHub Pages — Theme by mattgraham
Mars’ Avatar Guide
squeak
Thank you for getting one of my avatars!
Please don’t forget to rate your Itch and Gumroad products!
General Tips
- The only blendshapes that are meant for editing are contained within the
=== User Editing ===section. - The Blender file is set up, so you can just apply the
Subdivision Surfacemodifier. Be sure to check theUse Custom Normalsoption under the advanced settings for that modifier. You may also want to remove all of the projected floof. These are parts which projected the UV map and normals from the main body and look ugly after subdivision. Usually they are selected by a vertex-group called something likeProject FlooforHip and Shoulder Floof.
VRChat Setup
- Set up a project with the VRChat Creator Companion
- Add D4rk’s Avatar Optimizer
- Import the
.unitypackage
The setup scene is located under Assets/**AVATAR NAME**/Setup VRChat/Scenes
Adapt and upload an avatar with the VRC SDK and have fun!
ChilloutVR Setup (if included)
- Set up a project with the current ChilloutVR Unity Version
- Import the newest CCK
- Import the
.unitypackage
The setup scene is located under Assets/**AVATAR NAME**/Setup ChilloutVR/Scenes
Adapt and upload an avatar with the CVR SDK and have fun!
VRM Setup (if included)
- Set up a Unity project
- Import the latest supported UniVRM 0.X
- Import the
.unitypackage
The setup scene is located under Assets/**AVATAR NAME**/Setup VRM/Scenes
Export through UniVRM. Be sure to check the ‘Reduce Blendshape’ option
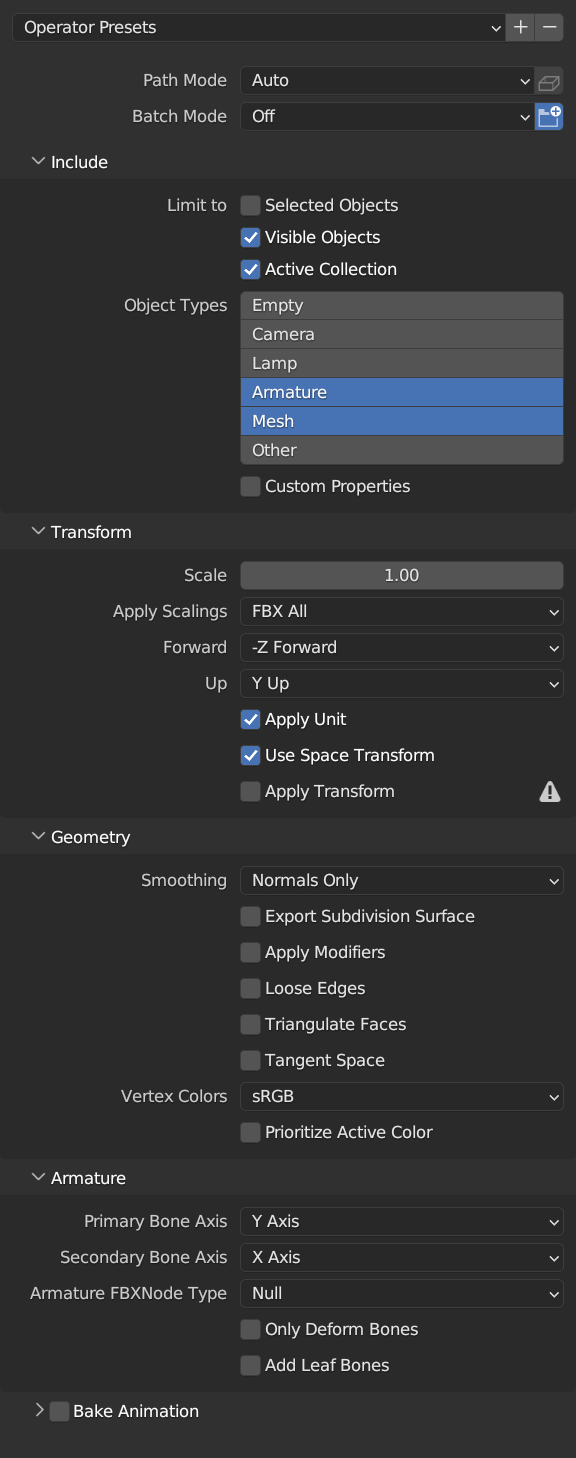
Blender Export
Use these export settings:
Unity Import
- Drag the model into Unity and ensure that this are its import settings.
- Make sure that
Read/Write EnabledandLegacy Blend Shape Normalsis ticked.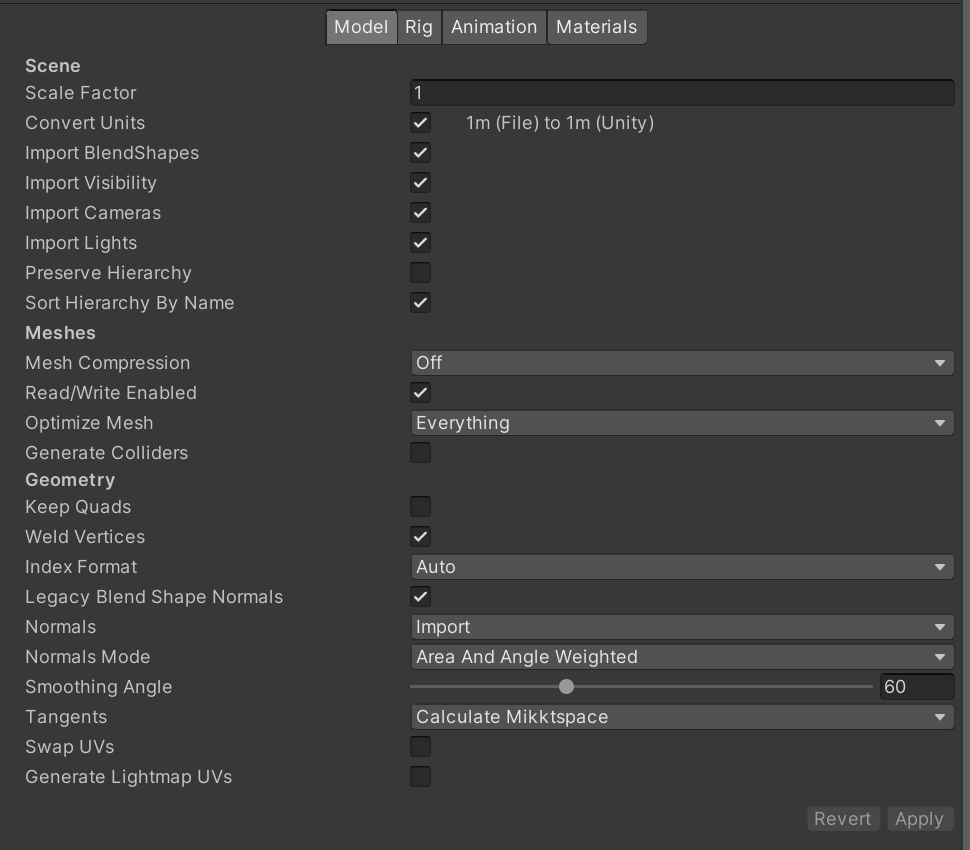
- Make sure that
- In the
Rigtab set theAnimation TypetoHumanoid. - For the
Avatar Definitionyou can either reuse one from the original Avatar, or if you modified the Rig, you must configure a new one. (To do so set the Animation Type toNone, apply, and then set it again toHumanoid. Yes, Unity is stupid.)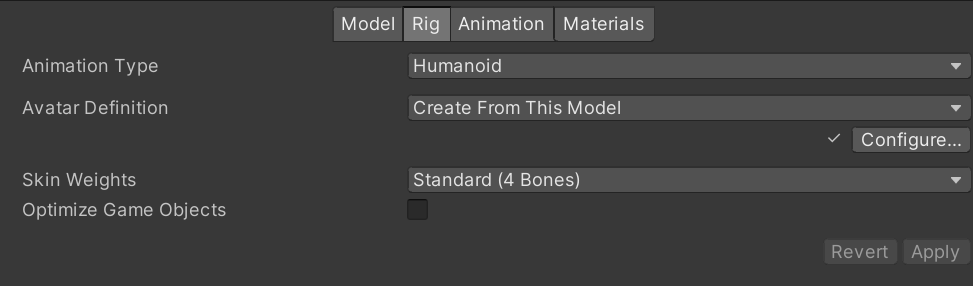
- Ensure the
Avatar Definitionis configured the following way:- Unity sometimes doesn’t map the
Chest, ensure it is mapped. - Map the
Toes.L|Ras the UnityFoot. - Don’t map the Unity
Toes. - Unmap the
Jaw. (Under Head)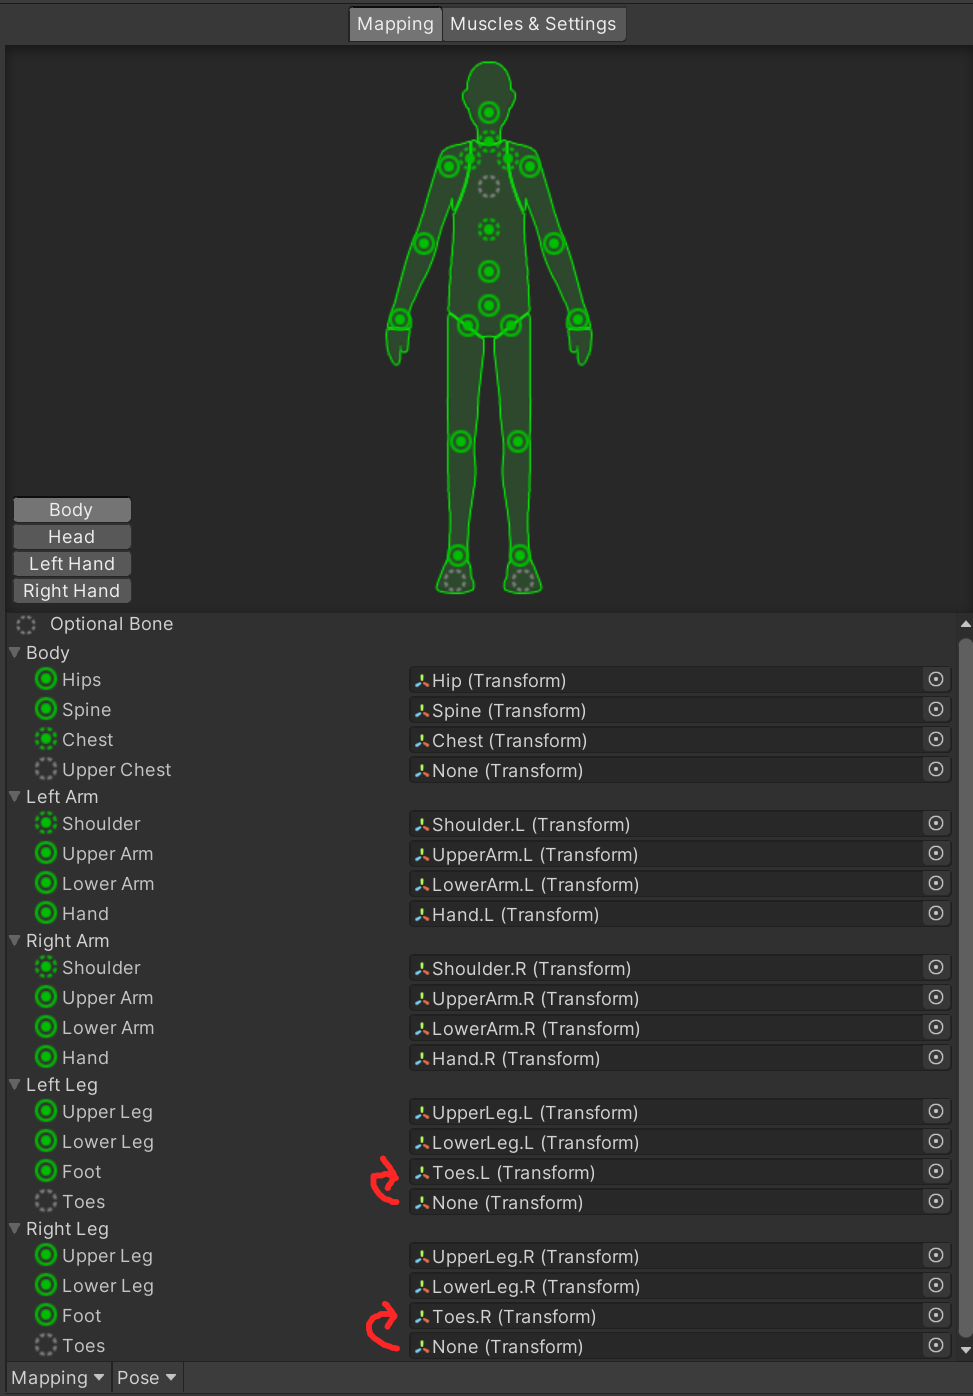
- Unity sometimes doesn’t map the
Contact / Links
Find all my links at mars.squirrel.pub
- Mars
Cheers!